Calibrate AfiLab - Milk Test Method
The system uses data from the Milk Test results to calibrate AfiLab. This data is taken from the periodic Milk Tests performed on the farm. If the Milk Test results were entered into AfiFarm, ask your dealers’ technician to set the system to automatically use the data to calibrate the AfiLabs. When using the Automatic Calibration option, you can either input the Milk Test results data manually or import the data into the system from a file.
Enter Milk Test data into AfiFarm using any of the following methods:
-
Manual entry - of milk test data into cows’ data via milk test application
-
Manual entry - of milk test data into cows’ data via the data entry screens.
-
Import data - as an Excel file.
-
Import data - as a part of the Import Data Exchange Protocol.
Note: not all protocols support this method of importing. Please contact support for further assistance.
Manual Entry - milk test application
Enter milk test data using the milk test application
To manually input milk test data:
-
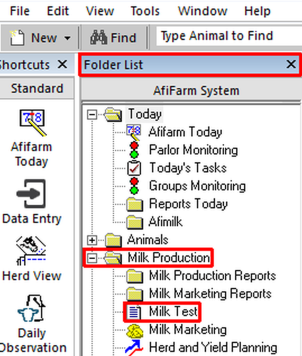
In the folder List, open Milk Production, then click Milk Test.
-
In the Milk Test window, click New.
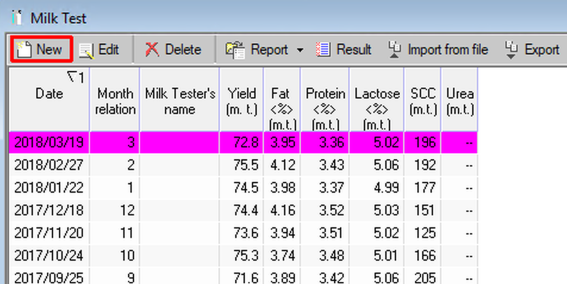
The Milk Test Wizard screen opens. By Default, the Date box and Month Relation box display today's date and the current month.
-
In the Date box, set the date that the milk samples were collected.
-
Complete the Milk Tester Name box (Optional).
-
In the Month Relation box, select the month to which the milk samples refer. Example: January's Milk Test was delayed and performed on June 2nd, but within the framework of monthly tests it refers to May.
-
Select the Session during which the milk samples were taken.
Note: In some farms with two sessions, samples are taken from one session. If milk samples are taken only during one Session, it is imperative to select the session to ensure accurate automatic calibration of the devices after a Milk Test.
Note: In some farms with three sessions, samples are taken from two consecutive sessions out of the three.
-
Click Finish.
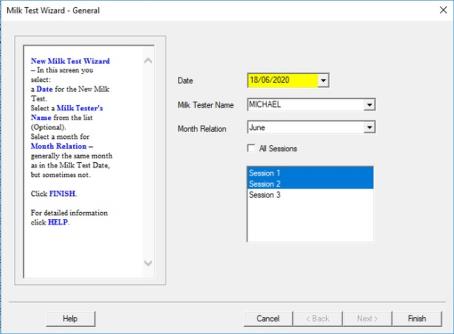
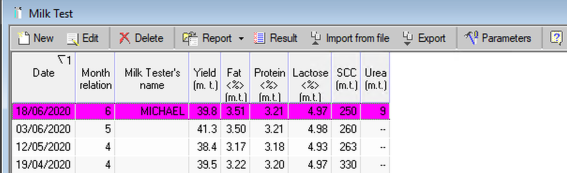
A new Milk Test Row Appears – it displays the date selected in the Date box. The system displays the Milk Test results data.
Manual Entry - data entry screen
Enter milk test data via the data entry screen
To manually input milk test data:
-
In the Milk Test window, click Result.
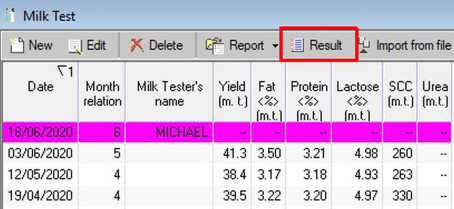
The system displays the Milk Test Result Input screen according to the specified date.
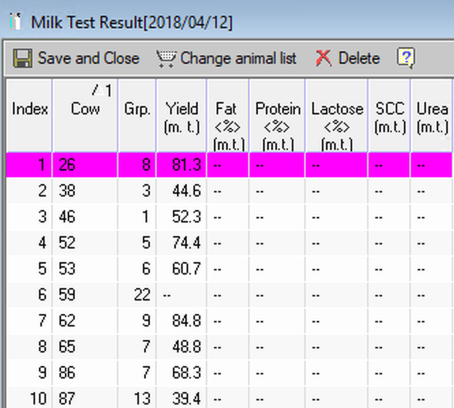
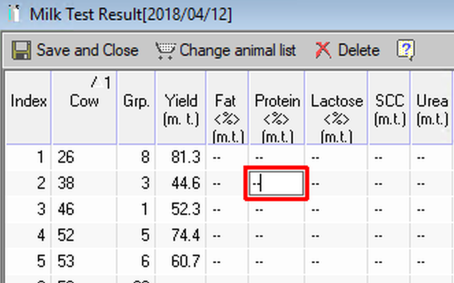
- Double-click the selected cell, and then manually enter the data.
Note: Fat and Protein are mandatory. Lactose is optional.
-
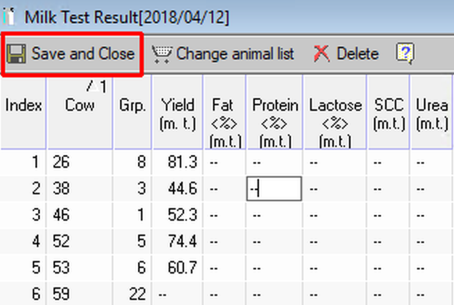
Click Save and Close.
Import Data as an Excel File
Import data from an Excel file. If the data from the milk test lab is not received in an Excel format, first transfer it into Excel.
Importing the data as an Excel file follows three main steps:
-
Transfer the data into Excel Format.
-
Configure AfiFarm to the Milk Test file format (this is a one-time operation, which is done after receiving the milk test file for the first time).
-
Import the data.
To transfer the data into Excel format:
-
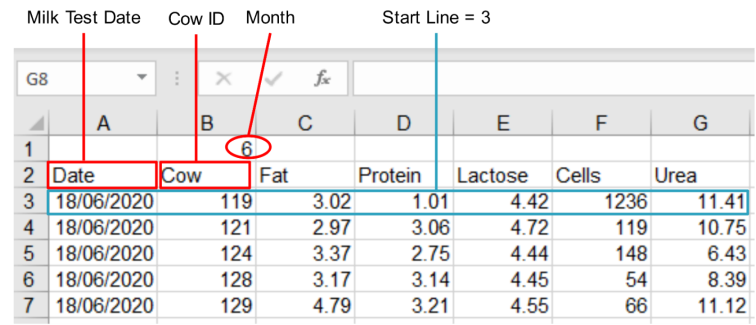
Open a new Excel file and enter the data in the format shown below.
|
Data |
Description |
|---|---|
|
Date |
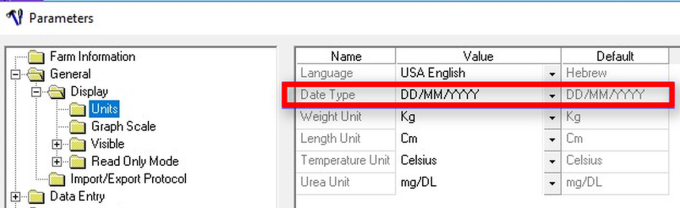
Displayed in the first field and must match the AfiFarm date type. Milk Test Date format must match AfiFarm's Date Type. Click: Tools > Parameters > General > Display > Units in order to check which Date Type you have:
|
|
Cow |
Displays the Cow ID number. |
|
Month |
Displays the month (in this example June = 6 [ Line 1, Column 2]). |
|
Start Line |
Data starts on Line 3. |
-
Save the Excel file (at a chosen path) as backup.
-
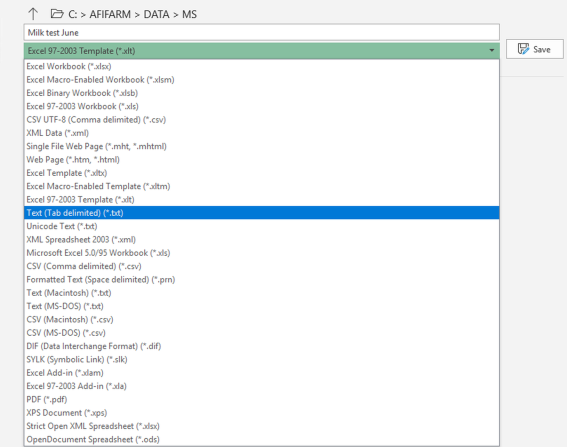
Save the file as a "Text (Tab Delimitated) (*.txt)" file to C:\Afifarm\Data\MS.
-
Close the Excel file
Note: Original Excel file must be closed before importing the file, otherwise the import process will fail.
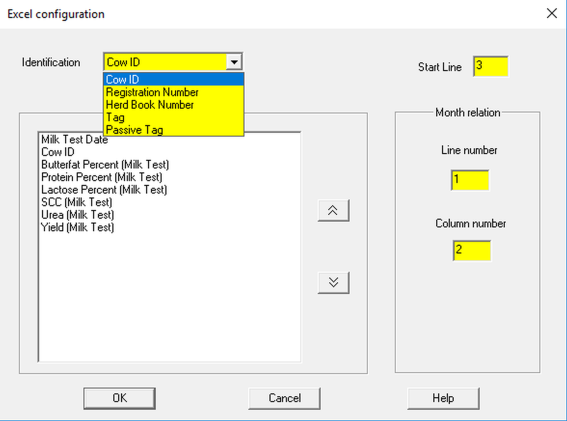
To configure AfiFarm to the milk test format:
-
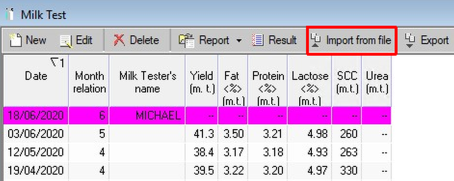
In the Milk Test window, click Import from file.
The Excel configuration screen opens.
-
In Identification, open the drop-down list, and select Cow ID (or one of ID options used in the Excel file).
-
Arrange the Data fields in the same order as the Excel file.
Use the  and
and  buttons to adjust the order.
Note: This will become the default screen.
-
Click OK.
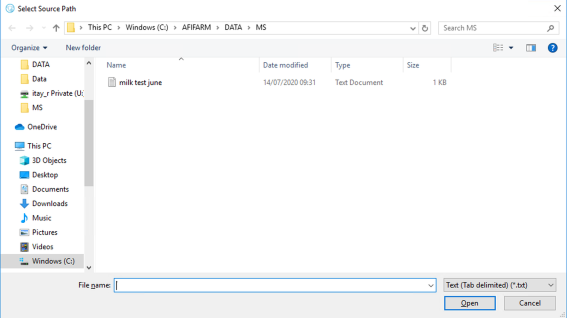
To import the data:
-
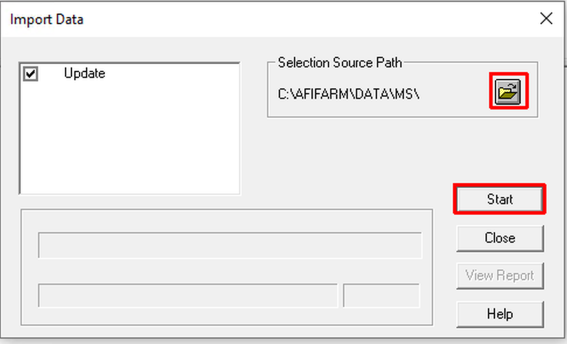
Select the Source Path, click the file name, and then click Open.
The import data screen opens.
-
Click Start.
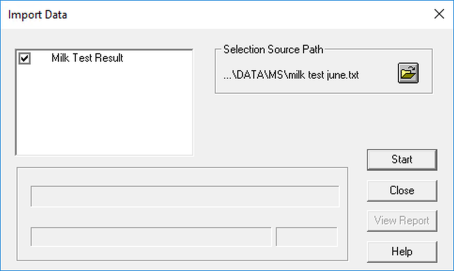
Once the process is complete, the View Report button is enabled.
-
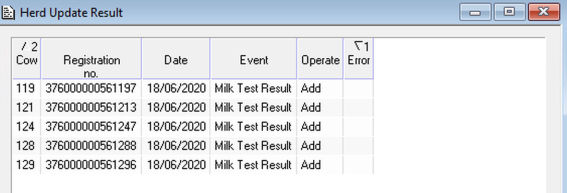
Click View Report.
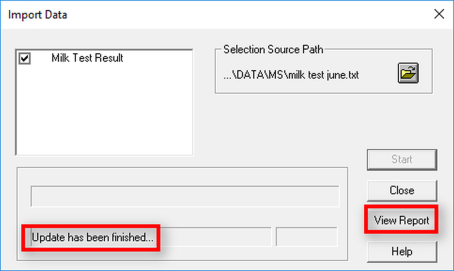
The Herd Update Result screen opens:
-
Return to the Milk Test window. The relevant Milk Test row should appear with results.
Import Data from a Protocol
Import the data from a protocol with external herd management software.
To import milk test data from external herd management software:
-
In the ABC Dashboard, click File, click Import, then click Data.
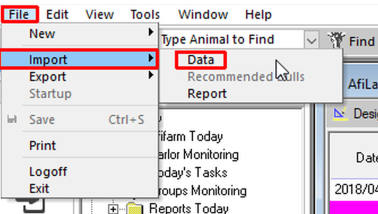
The Import Data dialog box opens.
-
Click Browse
 , then navigate and select the relevant file.
 -
Click Start.